The Snatch

The Snatch is the first of the two competition lifts in Weightlifting. In it, the bar travels from the floor to overhead in a single movement.
The snatch is performed with a wide grip. A good way to check the correct width is stand with the bar and spread your hands until the bar sits at your hip below you lower abdomen and above your pubic bone. As you progress in technique and your own style, you may want to tweak the width accordingly (also if you gain or lose weight, optimal width can be affected).

Hook Grip
In essentially every movement practiced in weightlifting (Every pulling motion certainly, not accounting for straps or when deliberately choosing not to) the bar will be gripped with a Hook Grip. The Hook Grip is achieved by wrapping the thumb around the bar fully, and then overlapping your thumb with your fingers. Your first and middle finger should sit above the thumb and cause friction, allowing the grip to 'lock' in place without having to use excess tension to hold the bar, which leads to tightened forearms, which leads to pulling and bending of the arms at inappropriate times.
After the first time using the Hook Grip, your fingers and thumb will ache, but you will quickly adapt and be able to use it at any weight.
1st Pull - Floor to knees


The lifter should now begin to pull. The bar path should be close to the shins but not scraping. Most lifters start with the bar somewhere between the tip of their toes and the base of their toes. When pulling the pressure should be felt along the midfoot, too far on the toes and the lifter will tip forwards, too far backwards and the bar will drag up the shins and likely catch the knees. From the side view the pull should be roughly vertical, with some amount of backwards travel. Now, the problem with the bar travelling backwards is that your knees are in the path the bar wants to take. So, as you pull the bar, your knees should travel backwards out of the way (This is mostly a natural movement, but may need remembering if it causes issues). A common way to move the knees further out of the way without affecting the back angle is to angle the feet outwards and as you pull and approach the knees, spread your knees outwards as well as backwards. This also allows a more vertical pull, which depending on proportions, may be beneficial.
During this pull, the shoulders should remain above or slightly in front of the bar when viewed from the side. During this pull you MUST remain flat footed, as the bar approaches the knees and particularly in the next stage of the pull, the weight should transfer more onto the rear of the foot as the bar is physically travelling backwards over the foot.
During ALL parts of the pulls, the back should be tight and strong. The shoulders should be loose and the scapula and lats spread, allowing the bar to 'hang' from the shoulders.

To Recap 1st Pull
- Floor to Knees
- Shoulders above or slightly in front of bar
- Vertical/slightly back path
- Knees back/out out of the bar path
- Weight on Midfoot
- Strong Back
2nd Pull - Knees to base of Thighs
The second stage of pulling sees the bar travel from the front of the knees to above the base of the thigh muscles.

The movement backwards of the bar is not so great as it seems to an uninformed observer. The bar does travel backwards, but the knees also begin to travel forwards again.
The lifter 'sweeps' the bar backwards and into himself by pulling his palms backwards with his lats, in a similar muscle recruitment fashion as when one performs breaststroke whilst swimming. At the same time that the bar begins its backwards path along the thigh (close but not touching enough to drag on the thigh and slow down the bar) the lifters knees and hips will begin to travel forwards with the eventual goal of the bar and hips meeting roughly half way.
As the lats pull the arms backwards, the lifters chest should begin to stand proud and his ribcage will slightly rotate so that his chest is starting to face upwards. This along with a tight lower back will allow the lifter to keep their torso close to vertical. The shoulders still want to be above the bar at this point, perhaps in front slightly, but very minimally, definitely not behind the bar. The weight should be felt shifting towards the back of the feet, the hamstring and glutes should begin to be placed under tension form the way the bar is now positioned.
The feet should still remain flat on the floor.

To Recap the 2nd Pull
- Knees to base of thighs
- Lats sweep the bar back into the body
- Chest begins to rise
- Knees travel forwards under the bar
- Shoulders above bar
- Weight transferring to rear of foot
3rd Pull - Bottom of Thighs to Hips

The lats continue to sweep the bar into the hips of the lifter, the knees and hips continue to travel forwards and underneath the bar. The lifters torso will begin to approach a vertical angle now, at the point of the bar being in the hips, the torso will be at almost 90 degrees with the floor. The knees and hip joints must not be straight at this point, otherwise no power can be transferred vertically. By the time the bar is in the hips, the shoulders will be straight above and likely slightly behind the bar (ideally not too far).
The weight should be felt very much on the rear of the foot at this point, the hamstrings, quads, glutes and even the calves somewhat should feel tension upon them, they should feel locked and ready to explode into action. Throughout all of the pulls so far, the arms should be at full extension and without excessive tension in the biceps or forearms.

Some lifters will be slightly on their toes at this point. This is usually a sign of form breakdown, generally at near maximal weights and/or a rushing of the pulls to try and impart more momentum through speed off the ground. For beginners, it is optimal to be somewhat slow and deliberate with the pulls up until the hips are reached, to ensure that they hit all the correct positions. Being on the toes early makes it very difficult to impart maximal force from the ground up into the bar, and will generally result in a less than ideal bar path.
To Recap the 3rd Pull
- Bottom of Thighs to Hips
- Lats Sweeping the bar into the lifter
- Knees and hips travelling forwards and under the bar
- Torso is vertical or almost vertical
- Legs are bent and loaded
- Shoulders above/slightly behind bar
- Weight on rear of foot
4th Pull - Hips to Extension
 This is the section where all the power and force built up in the legs and back is released, throwing the bar upwards into the air. The previous 3 pulls are merely a setup for this segment, but do them correctly and this extension will allow you to lift much more weight than you think you can.
The legs that had previously been kept bent and taught are now quickly and explosively straightened out in a 'pop' type movement. It should happen as quickly as you can manage. The faster you pop, the easier the lift will be. It's a very simple movement, but it takes a while to master or to even understand. You are not flinging your hips into the bar, you are not pulling it up with your arms. Your legs are the pistons that exist between the bar and the floor. It is your job to push so hard and fast that the bar is 'pulled' upwards by your arms being attached to your torso, and in turn to your legs.

Your shoulders will likely travel back slightly, this is normal given the movement your hips have gone through to extend. But when extending, you should think about trying to extend vertically, rather than pulling everything backwards. Some lifters Hyperextend (some quite successful lifters) but this is an exception to the rule and although it works for them is unlikely to work quite as well for anybody else.
At the apex of the pull, most lifters will spread their feet apart somewhat into their ideal squatting position (which for most people is not the same as their optimal pulling position). You can practice hitting the correct distance by using drop snatches from a narrow to your wider stance, or simply jumping from pulling to catching position.


To Recap the 4th Pull
- Hips to Extension
- Press and extend your legs violently against the floor
- Attempt to extend vertically, not backwards
- Spread the feet if required
5th Pull - Pull Under

Once the hips have popped the bar upwards and the legs have fully extended, the lifter needs to violently pull himself under the bar immediately. The faster you can get under the bar, the less effort you have to put into pulling it high.
The initiation of the pull under should start with the arms and shoulder girdle tugging at the bar. This pull should be performed with the elbows up and slightly backwards, above the wrists and consequently above the bar. The elbows should be slightly backwards to ensure a closer bar path, the further away the bar is from the lifter, the less control he or she will have of it and the more it will arc behind them instead of above them.

The differentiation between pulling the bar up and pulling the lifter down is pointless. They are both the same movement and both perform the same function. The only variable that will affect this is the weight on the bar. But a good and efficient lifter can make every weight lifted look the same, catching 20kg at the same height as 200kg. Training to catch the bar higher simply adds a variable in training that reduces consistency and does not teach the lifter how to apply the correct amount of force to each weight. If they are applying maximal force on every weight, they they may as well only ever lift maximal weights, as they are still fatiguing themselves as though they were lifting heavy all the time.
To Recap the 5th Pull
- Pull violently against the bar
- Elbows above wrists
- Keep a close bar path by slightly pulling your elbows behind you
- As the bar travels above you, push upwards with your arms
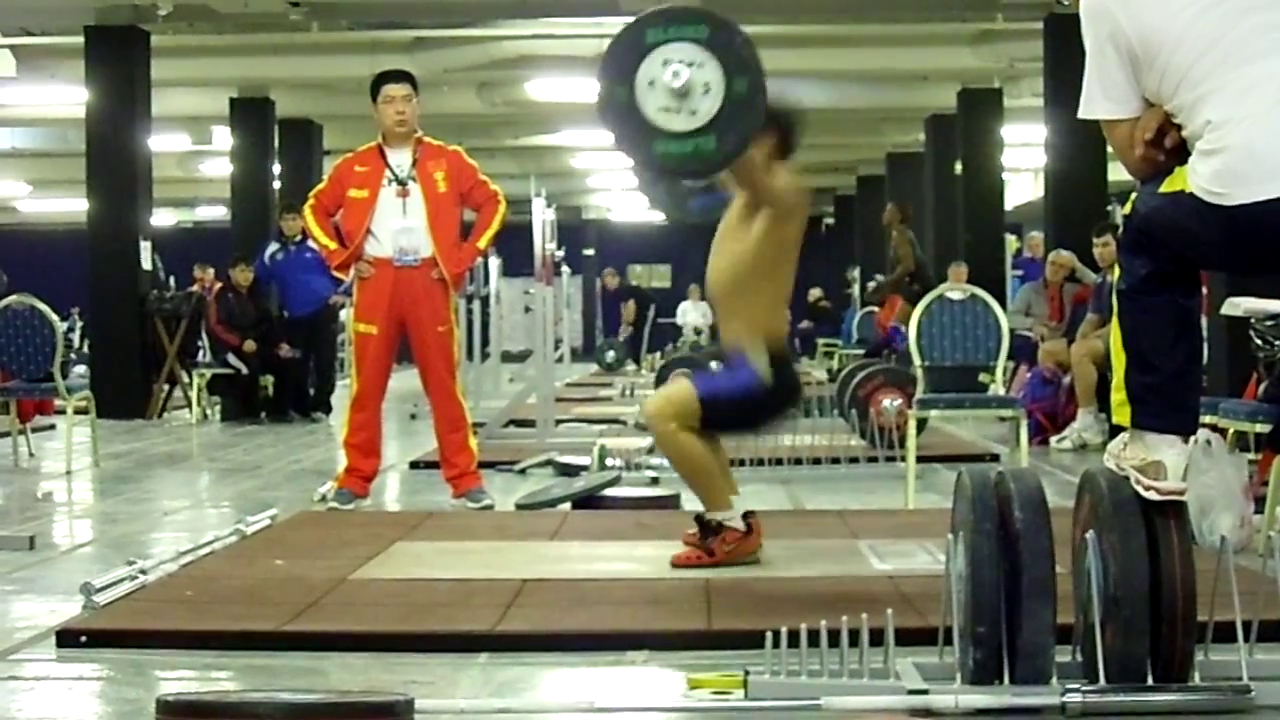
Catching and Recovering

Now you simply stand up. Take care not to shoot your hips out/back as this will force your shoulders forwards, shifting the weight forwards also, requiring greater shoulder flexibility to keep the bar overhead. In training, once you have fully stood, you should hold the overhead position for a few seconds to build a strong position. In competition you need only hold it overhead until you receive your 3 lights from the referees.

To Recap Catch and Recovery
- Catch with feet flat on floor
- Deep Squat Position
- Upper back Strong and Stable
- Knees out
- Near vertical torso
- Rise whilst keeping hips in/low
- Hold overhead position for a few seconds


No comments:
Post a Comment